ChipFoundry Local Quick Start Guide

This guide provides a quick start for setting up and using ChipFoundry locally, utilizing the provided GitHub template.

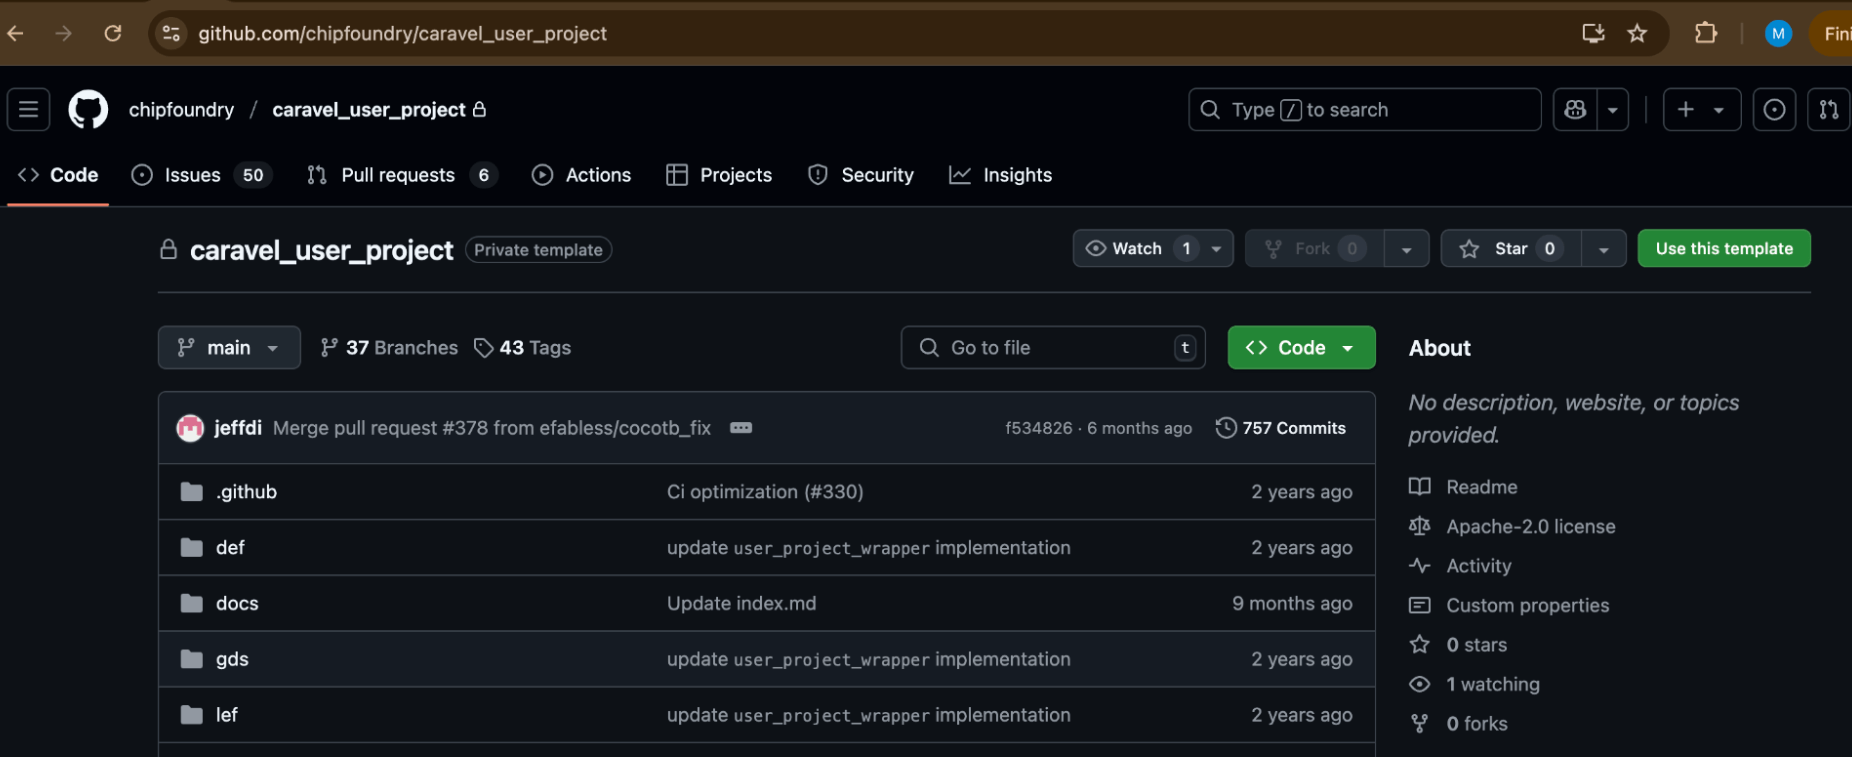
Step 1

Use the Caravel User Project Template using this link below

caraval_user_project.png

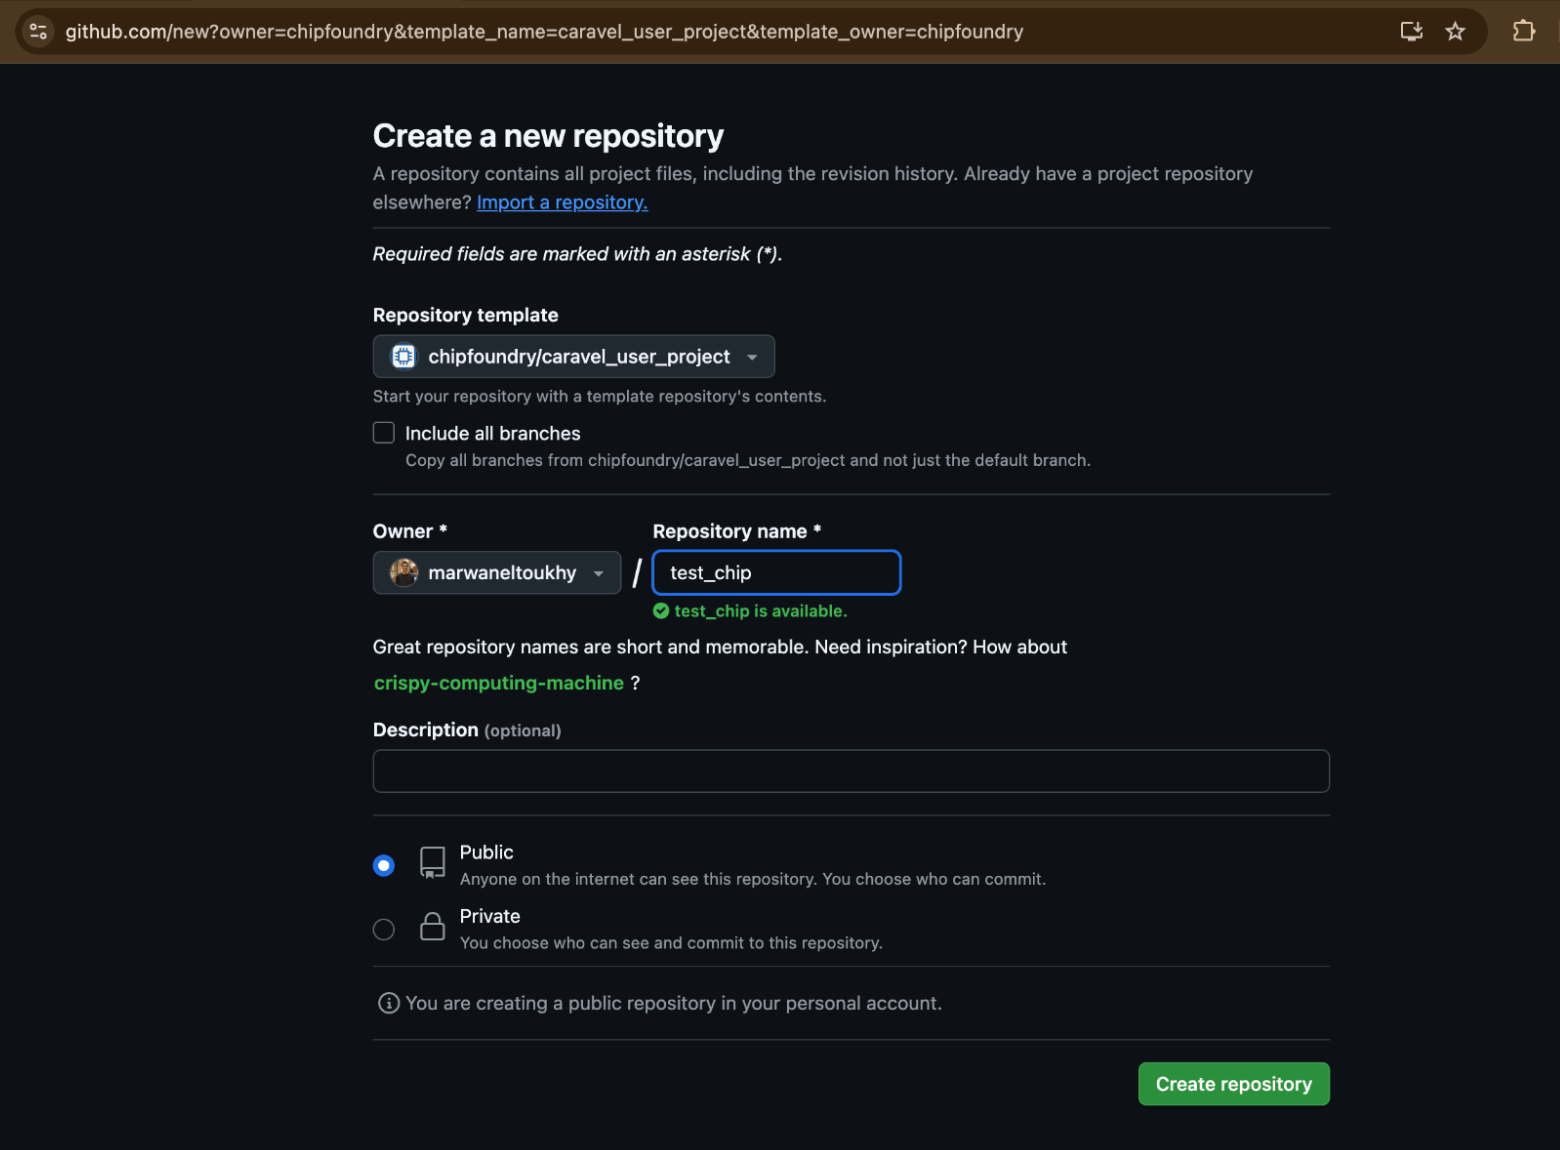
Step 2

Follow the guide and create a new repo under your profile. You can make it public or private, depending on your preference for your design.

getting_started_step2.png

Step 3

On your local terminal, clone the repo you created on GitHub

git clone < your Github repo URL >

Step 4

To setup your local environment, run this command

cd <github_repo>

make setup

Step 5

You now have a local setup ready for development of your design. The first step should be writing your verilog code.

You can find an example of the verilog code here

verilog/rtl/user_proj_example.v.

Step 6

After you are done with writing your code, you need to integrate it with the user project wrapper. The user project wrapper can be found here verilog/rtl/user_project_wrapper.v

and inside it you should replace the example design instantiation with your own design, after this line

/*------------------------------------------------*/

/* User project is instantiated here */

/*------------------------------------------------*/

Step 7

Once you do that, you can now start validating your RTL code, this can be done using the cocotb infrastructure for digital simulation. To add a test to cocotb, you can follow this guide. Once you are ready to run the tests, update this file verilog/includes/includes.<rtl/gl>.caravel_user_project, where you will need to include all the RTL files for your design. To run the simulation:

# To run the RTL verification

make cocotb-verify-all-rtl

# To run the GL verification

make cocotb-verify-all-gl

Step 8

To harden your design, you have several options;
step8_option1.png

Option 1

Harden the user macro(s) first, then insert it into the user project wrapper with no standard cells at the top level.

step8_option2.png

Option 2

Flatten the user macro(s) with the user_project_wrapper.

sep8_option3.png

Option 3

Place multiple macros in the wrapper along with standard cells at the top level.

Step 3

On your local terminal, clone the repo you created on GitHub

git clone < your Github repo URL >

Step 4

To setup your local environment, run this command

cd <github_repo>

make setup

Step 5

You now have a local setup ready for development of your design. The first step should be writing your verilog code.

You can find an example of the verilog code here

verilog/rtl/user_proj_example.v.

Step 6

After you are done with writing your code, you need to integrate it with the user project wrapper. The user project wrapper can be found here verilog/rtl/user_project_wrapper.v

and inside it you should replace the example design instantiation with your own design, after this line

/*------------------------------------------------*/ /* User project is instantiated here */ /*------------------------------------------------*/

Step 7

Once you do that, you can now start validating your RTL code, this can be done using the cocotb infrastructure for digital simulation. To add a test to cocotb, you can follow this guide. Once you are ready to run the tests, update this file verilog/includes/includes.<rtl/gl>.caravel_user_project, where you will need to include all the RTL files for your design. To run the simulation:

# To run the RTL verification

make cocotb-verify-all-rtl

# To run the GL verification

make cocotb-verify-all-gl

Step 8

To harden your design, you have several options;
Cookie Settings
This website uses cookies

Cookie Settings

We use cookies to improve user experience. Choose what cookie categories you allow us to use. You can read more about our Cookie Policy by clicking on Cookie Policy below.

These cookies enable strictly necessary cookies for security, language support and verification of identity. These cookies can’t be disabled.

These cookies collect data to remember choices users make to improve and give a better user experience. Disabling can cause some parts of the site to not work properly.

These cookies help us to understand how visitors interact with our website, help us measure and analyze traffic to improve our service.

These cookies help us to better deliver marketing content and customized ads.